Saturday, October 15, 2011

Working with YUI2 Data Table and Script Node Data Source

Data Table might be one of the most powerful widgets in the YUI2 library. It supports column formatter, sorter, pagination, column resizing, column reordering, and most importantly, data binding. Like other YUI2 widgets, Data Table is able to utilize YUI's universal Data Source APIs to bind data to UI components. You just specify where the data comes from, how the data looks like, and which UI parts to bind certain pieces of data. The Data Source will do the heavy lifting for you. It takes care of sending/retrieving data, parsing data, and feeding parsed data to the associated widget. Pretty powerful stuff.

In this article, I will demonstrate how to use YUI DataTable and DataSource to create a page that lets users search client records by client's first name, last name, and ID. If any client record is found, we display the search results in a table on the same page.

For DataSource, I use ScriptNodeDataSource. One of the major advantages of the ScriptNodeDataSource is that its data requests can be sent across domains by using JSONP (JSON Padding) instead of XHR. More discussions about JSONP can be found here.

First, let's define a ScriptNodeDataSource and response schema.

// Setup remote data source
var ds = new YAHOO.util.ScriptNodeDataSource(
    'http://www.anotherdomain.com/search/');

// The response JSON will have a results array
// Each result object has userId, firstName, lastName, birthDate, 
// address1, address2, address3, city, state, and zip properties.
ds.responseSchema = {
    resultsList: "results", 
    fields: [ "userId", "firstName", "lastName", "birthDate", 
        "address1", "address2", "address3", "city", "state", "zip" ]
};

Define table columns. Use column formatters for column name, date, and address. Sort table rows by names.

//
// Column formatters
//

// Format column Name
var formatName = function(elCell, oRecord, oColumn, oData) {
    // Concat the last name and first name
    var strName = oRecord.getData("lastName") + ", " 
        + oRecord.getData("firstName");

    // Wrap name in a link that goes to client details page
    var strUserId = oRecord.getData("userId");
    elCell.innerHTML = '<a href="' + getResultUrl(strUserId) 
        + '">' + strName + '</a>';
};

// Format column DOB
var formatDate = function(elCell, oRecord, oColumn, oData) {
    if (YAHOO.lang.isString(oData))
    {
        if (Y.env.ua.ie > 0)
        {
            // IE has problem to parse date string "yyyy-mm-ddT00:00:00"
            // Here, we fall back to manipulating the date string
            elCell.innerHTML = oData.split("T")[0].replace(/-/g, "/");
        }
        else
        {
            var oDate = new Date(oData);
            elCell.innerHTML = oDate.format("mm/dd/yyyy");
        }
    }
};

// Format column Address
var formatAddress = function(elCell, oRecord, oColumn, oData) {
    var strAddr = oRecord.getData("address1") + " "
        + oRecord.getData("address2") + " " 
        + oRecord.getData("address3");
    strAddr = strAddr.trim() + ", " + oRecord.getData("city") + ", " 
        + oRecord.getData("state") + " " + oRecord.getData("zip");

    elCell.innerHTML = strAddr;
};

//
// Sorters
//

// Sort by name
var sortName = function(a, b, desc) {
    var fnComp = YAHOO.util.Sort.compare;
    var compState = fnComp(a.getData("lastName"), 
            b.getData("lastName"), desc);
    if (compState == 0)
    {
        compState = fnComp(a.getData("firstName"), 
            b.getData("firstName"), desc);
    }

    return compState;
};

// Column definitions
var colDefs = [ 
    { 
        key: "name", label: "Name", 
        resizeable: true, sortable: true, 
        formatter: formatName, // formatName column formatter
        width: 120, 
        sortOptions: { sortFunction: sortName } // sortName sort function
    }, 

    {
        key: "address", label: "Address", 
        resizeable: true, sortable: true, 
        formatter: formatAddress, // formatAddress column formatter
        width: 250
    },

    {
        key: "birthDate", label: "DOB", 
        resizeable: true, sortable: true, 
        formatter: formatDate // formatDate column formatter
    },

    {
        key: "userId", label: "Client ID", 
        resizeable: true, sortable: true
    }
];

Setup table configuration. When the table is created, the data table will send out an initial request to get data. We want to capture this initial request, and prevent the server side from starting any search work, because at this moment our user hasn't filled any search keywords in the text fields yet (First Name, Last Name, and Client ID text fields). The initial request is not triggered by our users. It has to be filtered out. To do this, we append "&init=true" parameter to the initial request's URL so the server side will know.

// Table configurations
var tableCfg = {
    initialRequest: "&init=true", 
    sortedBy: {
        key: "name", dir: "asc"
    }, 
    width: "100%", 
    height: "30em", 
    MSG_LOADING: "", 
    MSG_EMPTY: ""
};

The beef is here --- the search function which is responsible of gathering user inputs, validation, clearing previous search results in the table, constructing search queries, sending out query requests, displaying returned results, and handling errors.

// Field validation
var validate = function(params)
{
    // Validation logics go here ...

    return true;
};

// Search function. 
// It will be invoked when users click the "Search" button
var fnSearch = function(e) {

    // Suppress form submission
    YAHOO.util.Event.stopEvent(e);

    // Get search field values
    var params = {
        "firstName": document.getElementById("firstName").value,
        "lastName": document.getElementById("lastName").value,
        "userId": document.getElementById("userId").value
    };

    // Field validations
    if (validate(params) == false)
    {
        return false;
    }

    // Callbacks for datasource.sendRequest  
    var callbacks = {
        success: function(oRequest, oParsedResponse, oPayload) {
            console.log("Retrieved search results");

            // Enable the table
            table.undisable();
    
            // Flush and update the table content
            table.onDataReturnInitializeTable.apply(table, arguments);

            // Sort by name in ascending order
            table.sortColumn(table.getColumn("name"), 
                YAHOO.widget.DataTable.CLASS_ASC);

            // Update the count of search results
            document.getElementById("results-count").innerHTML = 
                " - " + oParsedResponse.results.length + " result(s)";
        },

        failure: function() {
            console.log("Failed to get search results");

            // Failure handling code
        },

        scope: table
    };

    // Delete any existing rows, clear result count, 
    // and disable the table
    table.deleteRows(0, table.getRecordSet().getLength());
    document.getElementById("results-count").innerHTML = "";
    table.disable();

    // Construct search query
    var strQuery = "";
    for(var key in params)
    {
        strQuery += "&" + key + "=" + params[key].trim();
    }

    // Send out query request
    ds.sendRequest(strQuery, callbacks);
    console.log("Data source sent out request");

    return false;
};

Hook up the search function with the button click event. And finally, create the table.

YAHOO.util.Event.addListener("search-btn", "click", fnSearch);

// Construct data table. Pass in column definitions, data source, 
// and table configuration
var table = new YAHOO.widget.ScrollingDataTable("results-table", 
    colDefs, ds, tableCfg); 
console.log("Constructed data table");

Monday, September 5, 2011

Implement private members in JavaScript

One of the reasons that JavaScript seems unnatural to many programmers with OO background is that JavaScript lacks a lot of OO parts in syntax. For example, it doesn't have class or access modifiers, although with some tricks these concepts can still be implemented in JavaScript. Today, I will look into how to implement private properties and methods.

Pseudo Private Marker


Properties in objects are public, so are methods. Anyone who gets hold of an object is able to access its properties, methods, even its prototype's properties and methods all the way to the root prototype object (prototype is just another property after all). One approach to 'implement' private members is to make private members 'look' like private, and hope other developers will not access or modify them. Over time, programmers adopted a convention of putting an underscore in front of a property or method name. This underscore acts like a marker to say "Hey, this is private. Don't touch it!". This kind of convention should sound familiar to Python developers. Other flavors of the same convention include adding two underscores at the front or another underscore at the end, e.g. __firstName or _firstName_.

var helloKitty = {
    _meow: function() { // Private
        return 'Meow~~';
    }, 
    hello: function() {
        return this._meow();
    }
};

helloKitty.hello(); 
// 'Meow~~'

The pro of this approach is that it is really easy. No extra code is required. However, this approach puts a lot of trusts in the hands of your code users. This can be both good and bad. The upside is that when users know what they are dong and really want to access or extend your private members, they can easily do so. After all the underscore is just a marker which doesn't provide any constraint over how a member is accessed.

var helloKitty = {
    _meow: function() {
        return 'Meow~~';
    }, 
    hello: function() {
        return this._meow();
    }
};

// Extend helloKitty._meow which is private
var superMeow = helloKitty._meow;
helloKitty._meow = function() {
    return superMeow() + ' mew~~~';
};

helloKitty.hello();
// 'Meow~~ mew~~~'

However, when API authors really want to forbid access to private members, this approach cannot enforce such constraint. Lacking of real access control is not ideal to most OO purists.

Scope and Closure


The following JavaScript code defined one global variable (myName), and two global functions (sayHello and greet).

var myName = 'David';
var sayHello = function(name) {
    return 'Hello, ' + name;
};

var greet = function() {
    return sayHello(myName);
};

greet();
// 'Hello, David'

According to the JavaScript good practice, we should try to avoid creating globals whenever possible. In this example, the variable myName and function sayHello are mere implementation details of the greet function. We should make them private.

Attempt 1

var greet = function() {
    var myName = 'David';
    
    var sayHello = function(name) {
        return 'Hello, ' + name;
    };

    return sayHello(myName);
};

greet();
// 'Hello, David'

Most JavaScript programmers will come up with this solution by moving private pieces into the function. Actually, in most cases, this solution should be good enough. However, it should be noticed that the local variables and functions will be created every time the function is invoked. For this simple example, this solution is fine. However, for functions which contain a lot of local variables, functions, or have massive preparation code in the functions, the overhead to re-create these locals will be more significant.

Attempt 2

With the help of self-executing function and closure, we created a scope where private variables and functions live inside:

var greet = (function() {
    var myName = 'David'; // Private variable

    var sayHello = function (name) { // Private function
        return 'Hello, ' + name;
    };

    return function() { // Return a function
        return sayHello(myName);
    };
})(); // Notice the ending ()

greet();
// 'Hello, David'

The self-executing function creates a scope that hides variable name and sayHello from the outside world. Meanwhile, because of closure (one of JavaScript's most powerful features), the returned function is able to hold references to the private variable name and private function sayHello.

Please notice that the code to create the myName variable and sayHello function is executed only once. When the greet function is called, myName and sayHello are already there and won't be re-created again.

This solution works well for private variables which won't need to change for different function invocations. In our case, variable myName doesn't change when we call the greet function. In another world, we can think myName as a private constant.

Instance and Class Private Members


var Person = function() {
    var myName = 'David'; // Private variable

    var sayHello = function(name) { // Private function
        return 'Hello, ' + name;
    };

    this.greet = function() { // Privileged method
        return sayHello(myName);
    };
};

var david = new Person();
david.hello();
// 'Hello, David'

This is a typical constructor function. JavaScript has no implementation of class. A constructor function might be the closest thing to a class. Here we defined a Person 'class' which has a private variable name, a private function sayHello, and a privileged method greet.

Variable myName and function sayHello are visible only in the constructor function Person. They are not accessible outside of the scope created by the constructor function.

Moreover, because of the closure, the function this.greet is able to access the private variable myName and private function sayHello. We call function this.greet a privileged method. It is exposed to the public, and it can see the class' internal secrets -- private members name and sayHello.

This approach is pretty an ideal implementation of private members, however, every time a constructor function is called to create an object, its local members (variables and functions) will be re-created. In our case, myName, sayHello, and this.greet will be re-created every time the Person constructor is invoked. This is not efficient, and wastes memories. It is recommended to have shared members especially reusable functions assigned to the prototype object outside of the constructor function. Here, we're going to do so to the greet function which is meant to be public and reusable.

var Person = function() {
    var myName = 'David'; // Private variable

    var sayHello = function(name) { // Private function
        return 'Hello, ' + name;
    };
};

Person.prototype.greet = function() { // Shared public function
    ... ...
};

The greet public function is created only once, and it is shared by all instances created by the Person constructor. However, here comes a problem: how can we access the private members defined in the constructor from the greet function?

We can change myName and sayHello to this.myName and this.sayHello, and in the greet function we are able to access them by calling this.myName and this.sayHello. However, doing so made myName and sayHello public, which defeats our original purpose.

Our goal is to have myName and sayHello private but keep greet public, meanwhile, have greet shared by all instances created by the Person constructor.

To achieve this goal, we again borrowed the power from self-executing functions and closures. This time, the self-executing function returns a constructor function which keeps references to the myName variable and sayHello function through the closure which is created by the constructor function.

var Person = (function() {
    var myName = 'David';

    var sayHello = function(name) {
        return 'Hello, ' + name;
    };

    // Constructor fucntion
    var Constr = function() {
    };

    // Public methods
    Constr.prototype.greet = function() {
        return sayHello(myName);
    };

    return Constr; // Return the constructor function

})(); // Don't forget the ()

var david = new Person();
david.greet();
// 'Hello, David'

Please notice that myName and sayHello are created only once. Once they are created, they are shared by all objects created by the constructor function, however, they are not accessible outside the constructor and the self-executing function.

myName and sayHello are not only private members, they are also class static members. Because these variable and function are bound to the constructor function (the closest thing to class in JavaScript) via closures, and thus shared by all instances created by the constructor.

Wednesday, July 6, 2011

Python 2.7 study notes - part 1

I've established a habit to take notes when studying a new language or framework. This habit 'forced' me to extract essential knowledge from study materials, and compile them into notes which can be used as a cheat sheet for review.

Lately, I found more of my friends expressed their interests in learning Python. Python is certainly gaining attentions ... at least in my circle (PHP or Java developers). I thought to myself 'hmm, why not share my notes with my friends, or even post it in blog?'. So here it is. This note is not meant to be comprehensive. For a full Python tutorial, I recommend the book 'Dive into Python'.

Get help


# List attributes of an object
dir(something)

# Print doc string
print something.__doc__


What is False


None, 0, empty string, empty list, empty tuple, and empty dictionary are false.


Dictionary


d = {'firstname': 'david', 'lastname': 'cai'}

d.keys()
# ['firstname', 'lastname']

d.values()
# ['david', 'cai']

d.items()
# [('firstname', 'david'), ('lastname', 'cai')]

A list of keys returned by the keys method is not in order.
The values method returns a list of values in the same order as the list returned by the keys method.
The items method returns a list of tuples in the same order as the list returned by the keys method. The tuple is consisted of key and value.

Delete an item:

d = {'firstname': 'david', 'lastname': 'cai', 99: 'something'}

del d[99] 
# {'firstname': 'david', 'lastname': 'cai'}

d.clear()
# {}

del deletes an entry in dictionary by key. clear deletes all entries.


List


Slicing:

l = ['first', 'second', 'third', 'fourth', 'fifth']

l[1:3]
# ['second', 'third']

l[-1]
# 'fifth'

l[1:-1]
# ['second', 'third', 'fourth']

l[:]
# ['first', 'second', 'third', 'fourth', 'fifth']

l[:4]
# ['first', 'second', 'third', 'fourth']

l[2:]
# ['third', 'fourth', 'fifth']

Slicing won't change the original list, instead it returns a new list containing all items of the list starting with the first index, and up to but not including the second index.

Add items to list:

l.insert(2, 'between 2 and 3')
# ['first', 'second', 'between 2 and 3', 'third', 'fourth', 'fifth']

l.append('sixth')
# ['first', 'second', 'between 2 and 3', 'third', 'fourth', 'fifth', 'sixth']

l.extend(['seventh', 'eighth'])
# ['first', 'second', 'between 2 and 3', 'third', 'fourth', 'fifth', 'sixth', 'seventh', 'eighth']

append takes a single item, and add it to the end of the list.
extend concatenates two lists.

Remove items from list:

l = ['first', 'second', 'third', 'fourth', 'fifth']
l.remove('first')
# ['second', 'third', 'fourth', 'fifth']
l.remove('sixth')
# ValueError: list.remove(x): x not in list

item = l.pop()
# item: 'fifth'
# l: ['first', 'second', 'third', 'fourth']

List operators:

l = ['first', 'second', 'third', 'fourth', 'fifth']
l += ['sixth', 'seventh']
# ['first', 'second', 'third', 'fourth', 'fifth', 'sixth', 'seventh']

l = ['first', 'second']
l = l * 3
# ['first', 'second', 'first', 'second', 'first', 'second']

+ operator returns a new list, however, the extend function only modifies the existing list.

Search in list:

len(l)
# 9

l.index('second')
# 1

l.index('something else')
# ValueError: list.index(x): x not in list

'something else' in l
# False

The built-in range function returns a list of integers:

range(5)
# [0, 1, 2, 3, 4]


Tuple


Immutable list. Faster than list. Tuples and lists can be converted back and forth.

tuple(['a', 'b', 'c'])
# ('a', 'b', 'c')

list(('a', 'b', 'c'))
# ['a', 'b', 'c']

t = ('a', 'b', 'c', 'd')
t.index('b')
# AttributeError: 'tuple' object has no attribute 'index'

'b' in t
# True

Assign multiple values:

(x, y, z) = ('a', 'b', 'c')
# x: 'a'
# y: 'b'
# z: 'c'

One-element tuple:

one = 1
t = (one,)

The comma after one is necessary. Without the comma, python won't know whether (one) is a tuple or a value of one.

Tuple can be used in string formatting (see below).


Formatting string


print "Hello, %s" % "world"
# Hello, world

print "Good %s, %s" % ("morning", "David")
# Good morning, David

print "The result is %d" % 7
# The result is 7

print "The result is " + 7
# TypeError: cannot concatenate 'str' and 'int' objects

print "Rate: %f" % 7.6864
# Rate: 7.686400

print "Rate: %.2f" % 7.6864
# Rate: 7.68


List comprehension


l1 = [1, 2, 3, 4]
l2 = [i * 2 for i in l1]
# l1: [1, 2, 3, 4]
# l2: [2, 4, 6, 8]

d = {'firstname': 'david', 'lastname': 'cai'}
["%s: %s" % (k, v) for k, v in d.items()]
# ["firstname: david", "lastname: cai"]

list = [1, 2, 3]
['%s' % item for item in list if item % 2 == 0]
# ['2']


List <---> string


str = ",".join(['a', 'b', 'c'])
# "a,b,c"

str.split(",")
# ['a', 'b', 'c']

str.split(",", 1)
# ['a', 'b,c']

split takes a optional second argument which is the number of split.


Default and named arguments


def sayHello(firstname, lastname='cai'):
  ...

sayHello('David')
# David Cai

sayHello('David', 'Smith')
# David Smith

sayHello(lastname='Smith', firstname='David')
# David Smith

Arguments are actually a dictionary in Python. Calling function without argument names is simply a shorthand.

Thursday, June 30, 2011

Facebook and my rant

I've been using Facebook for 6 months. There are two irritating issues that I met every time I use it.

One - I have little control of how my posts reach my audience. I have friends, co-workers, relatives, and direct family members all on Facebook. Whenever I want to post something I have to be very careful about what I'm gonna say. Because after you post it, every friend (in Facebook all contacts are considered to be friends) will see it. It isn't that I will say something offensive. Sometimes I just want to target a smaller group of audience. Won't it be nice to have something similar to Email's contact groups? Organize your contacts into different groups, e.g. co-workers and families. When you post, you can choose which groups to target. This introduced a lot of flexibility and also removed some unnecessary privacy confusions. This issue is about sending posts. My 2nd issue is about receiving posts.

I 'Liked' WSJ and since then I started to receive posts from that channel. The posts are actually interesting. The problem is it's just too many of them, and they started to polluting my news feed page. I didn't find an obvious way to manage these posts. Maybe I should look further. But won't it be great to have a simple filter mechanism? Users can define filters that automatically route posts from specific sources to user's predefined 'folders'. Like 'rules' in Outlook or 'smart filters' in Gmail.

The core of Facebook is graphs of nodes which communicate to each other. How to make the communication more effective and intuitive should be Facebook's highest priority to concern. Don't you think?

Sunday, April 24, 2011

MacVim setup for Python programming

There are already tons of blogs about setting up vim for Python programming. I've been going through these excellent articles this weekend. This blog is to record what steps I took to set up my own MacVim with Python.

(Disclaimer: In order to put together information from all different sources, I shamelessly copied/pasted content from other blogs. I'd try my best to give credit back to the authors by adding links to their original sources.)

MacVim as Python IDE

Install MacVim with Python


Either of the following two options can be used to install MacVim.

Option 1: Through Mac ports

Make sure Mac ports are the latest.

$ sudo port -v selfupdate

Install MacVim with Python.

$ sudo port install macvim +cscope +python26

(Source: Pietra's technical journals)

Option 2: "Make" your own

$ git clone git://github.com/b4winckler/macvim.git
$ cd macvim/src
$ ./configure --enable-pythoninterp --with-macsdk=10.6
$ make

To install MacVim, type:

$ open MacVim/build/Release

and drag the MacVim icon into your /Applications folder.

(source: MacVim Github)

Add the following to ~/.profile or ~/.bash_profile.

alias vim=/Applications/MacVim.app/Contents/MacOS/Vim

To test if MacVim has python integrated, type

:python print "Hello, world!"

in MacVim. It should respond "Hello, world!".

Look and feel


The default MacVim color scheme isn't that appealing. I found dark background is easier for my eyes. Light background could put a strain on my eyes after staring at screen more than one hour.

To install a color scheme, first, create a directory:

$ mkdir ~/.vim/colors

Then, go here for a list of color schemes. Download the *.vim file, and put it to the ~/.vim/colors directory.

The Lucius color scheme with dark background is amazingly beautiful. This color scheme also supports light and blue themes.

Move lucius to the colors directory. Edit .vimrc to turn on syntax highlighting and set color scheme:

$ mv lucius.vim ~/.vim/colors
$ vi ~/.vimrc

set nocompatible

syntax on
colorscheme lucius
"colorscheme mustang
set background=dark

Now, open MacVim to try it out. You can switch among dark, light, and blue themes by typing :LuciusLight, :LuciusDark, and :LuciusBlue individually in MacVim.

Lucius light

(Mustang2 is another great color scheme with dark background. You can find it here. For some people, if macvim cannot find mustang, you might need to rename Mustang.vim to mustang.vim.)

As for font, I prefer Monaco in size 12.

set gfn=Monaco:h12

Here are some other settings for tab, indent, search, and line numbers:

set tabstop=4
set shiftwidth=4
set expandtab
set softtabstop=4
set smartindent
set autoindent

set hlsearch
set incsearch
set showmatch

set number

Open new files in tabs


By default, "vi a_new_file" in terminal will open a new MacVim window. You might want to put the newly the opened file in a new tab.

Edit mvim:

$ vi /opt/local/bin/mvim

Add the following line at the top of the file below the comments.

tabs=true

And replace the if structure at the bottom of the file with the following:

# Last step:  fire up vim.
if [ "$gui" ]; then
  if $tabs && [[ `$binary --serverlist` = "VIM" ]]; then
    exec "$binary" -g $opts --remote-tab-silent ${1:+"$@"}
  else
    exec "$binary" -g $opts ${1:+"$@"}
  fi
else
  exec "$binary" $opts ${1:+"$@"}
fi

Use <gt> to switch tabs.

(Source: Web Expose)

CTags and Tag List


CTags and Tag list give you an outline of classes, members, and functions in a left-side panel. Quite handy for code navigation.

Install ctags:

$ port install ctags

Install taglist:

Download here. Copy taglist.vim to ~/.vim/plugin

Add these two lines in ~/.vimrc to turn on file type detection.

filetype on
filetype plugin on

Run ctags on your project folder to generate a tags file which contains locations of classes, members, and functions in your project. For example, here we generate a tags file for all python source code in the "my_django_project" directory and its sub-directories.

$ cd my_django_project
$ ctags -R *.py


Please notice: if you already have a directory with a exact same name as "tags" under "my_django_project", you will get a "ctags: Failure on attempt to read file : Is a directory" error message. You can either rename your "tags" directory to something else, or change the location where the tags file will be generated. This is not within the scope of this blog but you can find more details here.

ctags can be configured to skip indexing certain types of code. The following command has ctags skip indexing python import statements.

$ ctags -R --python-kinds=-i *.py

To see what else can be skipped, type:

$ ctags --list-kinds=python

In ~/.vimrc, bind F8 to ctags command so we can re-generate tags on the fly.

nnoremap <F8> :!/opt/local/bin/ctags -R --python-kinds=-i *.py<CR>

In MacVim, type :TlistToggle to open the tag list. Use <C-ww> to switch between windows, <C-]> to jump to tag when the cursor is over a word, and <C-t> to go back. Pressing <space> on a function name in the tag list shows the function signature. For a full list of tag list key bindings, check out this blog.

I bound F4 to :TlistToggle.

nnoremap <F4> :TlistToggle<CR>

If you'd like to open tag list on right, add this line to ~/.vimrc:

let Tlist_Use_Right_Window = 1

Omni Complete


If you ever used Visual Studio, Eclipse, or other modern IDEs, you probably already knew what Omni Complete does. Omni Complete is the equivalent IntelliSense or code autocomplete for vim.

Add this line to ~/.vimrc to enable omni complete for python.

autocmd FileType python set omnifunc=pythoncomplete#Complete

The key combo () to toggle omni complete is quite awkward. Here I changed it to .

inoremap <C-space> <C-x><C-o>

OmniComplete

Task list


It is a common practice for programmers to mark TODO and FIXME in code. The TaskList plugin shows a list of such marks.

Download it here. Copy the vim file to ~/.vim/plugin

Type :TaskList to open the list.

Task list showing TODO

Pyflakes


Pyflakes analyzes Python programs and detects various errors. It is a must-have plugin for me.

Download the plugin here. Unzip it to ~/.vim/

$ unzip pyflakes-vim.zip -d ~/.vim/

PyFlakes

SnipMate


One of TextMate's cool features is snippet. Type "for" then press the <tab> key, a block of for statement is automatically generated. Vim can have the same feature with the SnipMate plugin.

Download the plugin here. Unzip it to ~/.vim/

This video demonstrates SnipMate in action.

FuzzyFinder


Another extremely useful plugin. What does it do? See it your self: video.
You can download it here. The L9 library is also required because FuzzyFinder depends on it.

Type :FufFile to search in files. I added the following line in ~/.vimrc to bind <C-f><C-f> to :FufFile.

nnoremap <C-f><C-f> :FufFile<CR>

In FuzyFinder, type <CR> to jump to deeper directories or open a selected file in the current tab. Type <C-l> to open selected file in a new tab. For more details of FuzzyFinder usage, go here.


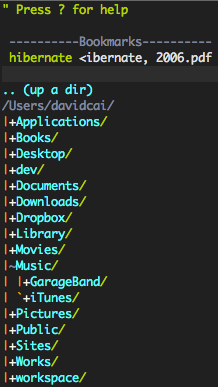
NERDTree


"The NERD tree allows you to explore your filesystem and to open files and
directories. It presents the filesystem to you in the form of a tree which you
manipulate with the keyboard and/or mouse. It also allows you to perform
simple filesystem operations." (Marty Grenfell, vim.org)

Type :NERDTreeToggle to open/close NERD Tree.

In NERDTree, type t to open the file in a new tab. Type :Bookmark to set a bookmark on a file or directory. <B> will open or hide a list of all bookmarks. In the bookmark list, type D to delete a selected bookmark. Type <C> on a directory will change the current working directory to that directory. More commands can be found in this article.

I bound the command to F3:

nnoremap <F3> :NERDTreeToggle<CR>

MatchIt


MatchIt is a handy plugin that lets you jump from a opening tag to its paired closing tag, and vice versa. To see it in action, check out MrTutcasts's awesome video.

Download it here. Unzip it to ~/.vim/

Move your cursor to a HTML tag, e.g. <div>, then type %. The cursor will jump to its closing </div> tag.

Save your fingers


All these wonderful plugins involve a lot of strokes on the Ctrl key. To make your typing more pleasant, it is recommended to swap Caps lock with the control key.

Change the key bindings at System Preferences -> Keyboard -> Modify keys.


Other interesting vim plugins


tComment: toggle comments on one or more lines.
MRU: list most recently used files.
SearchComplete: Tab to complete search words in / search.
SuperTab: Tab to activate auto completion.

Thursday, April 7, 2011

JSONP -- a cross-domain alternative to AJAX

AJAX utilizes XMLHttpRequest (XHR) APIs to send HTTP(s) requests to a web server and load server response directly in client-side script. XHR is the backbone of AJAX. It is widely used in so called web 2.0 applications, e.g. Google Gmail, Google Maps, and Facebook. Many libraries such as JQuery and YUI build on top of XHR to abstract the details and provide easy-to-use APIs for web developers and designers.

Unfortunately, XHR has a limitation. Due to the same origin policy, the server that receives the XHR requests and the client that sends out the requests need to be in the same domain. For example, the JavaScript in the page at www.example.com/demo.html can send out XHR request to www.example.com/service.php, however, it cannot send XHR requests to www.anotherexample.com/service.php, because example.com and anotherexample.com are two different domains.

Although it is meant to enforce web security, this policy created a common problem for web applications that need to consume external data (the data from external domain).

One of the solutions is to inject JavaScript coming from the external domain to the client page of the targeted domain. Because the injected JavaScript is evaluated in the client page, the script is treated as being from the same domain.

The following script inserts a "<script>" element to the head. The source of the inserted script points to the feed service at www.externaldomain.com, and passes along the "tag" parameter.

<script type="text/javascript">

var elHead = document.getElementsByTagName("head")[0];         
var script = document.createElement('script');
script.type = 'text/javascript';
script.src = 'http://www.externaldomain.com/services/feed?tag=gaming';
elHead.appendChild(script);

</script>

The feed service at www.externaldomain.com takes the "tag=gaming" parameter as an input argument, retrieves a list of feeds related to gaming, and convert the gaming feeds into a JSON string. For example:

'{"feeds" : [ { "title" : "game1", "date" : "03-21-2011", "author" : "David Smith" }, { "title" : "game2", "date" : "03-22-2011", "author" : "Steve Yavorski" }, { "title" : "game3", "date" : "04-05-2011", "author" : "Kelly Lee" } ]}'

However, the service at externaldomain.com can not simply return this JSON string as response data. The "src" attribute of the script element that we're injecting should point to a JavaScript instead of a JSON string. The JSON string itself cannot be evaluated to lines of runnable JavaScript code. So what we need to do is to wrap the JSON string in JavaScript.

<script type="text/javascript">
var responseText = '{"feeds" : [ { "title" : "game1", "date" : "03-21-2011", "author" : "David Smith" }, { "title" : "game2", "date" : "03-22-2011", "author" : "Steve Yavorski" }, { "title" : "game3", "date" : "04-05-2011", "author" : "Kelly Lee" } ]}';
</script>

The above JavaScript code will be executed in the client page. JavaScript in the page is now able to parse variable responseText to get the gaming feeds.

<script type="text/javascript">
var feeds = parseJsonStr(responseText); // parseJsonStr is a pseudo function
</script>

What we did above can be summarized as below:
  • Inject a "<script>" element to the HTML head
  • Point the "src" attribute to an external service that takes parameters and gets response data
  • Wrap the response data in JavaScript
  • Reference and parse the response data in JavaScript

The 3rd step "Wrap the response data in JavaScript" is also called JSON Padding, and this is where JSONP comes from.

The above approach has two problems. First, we don't quite know when the injected script finishes loading and when the responseText variable is ready to be consumed. Second, we don't want to hardcode the variable name to "responseText". The server shouldn't dictate what name the variable should be. To fix these problems, we can implement a callback function that will be invoked when the response is ready.

<script type="text/javascript">
function callback(responseText /* or whatever name you want to give */) {
  var feeds = parseJsonStr(responseText);

  // Do something about feeds ...

}
</script>

On the server side, the generated JavaScript will call the callback and pass in the JSON string as an input argument to the function:

<script type="text/javascript">
callback('{"feeds" : [ { "title" : "game1", "date" : "03-21-2011", "author" : "David Smith" }, { "title" : "game2", "date" : "03-22-2011", "author" : "Steve Yavorski" }, { "title" : "game3", "date" : "04-05-2011", "author" : "Kelly Lee" } ]}');
</script>

This way, we captured the moment when the response is available, and removed the naming of the JSON string from the server side.

To make things better, the name of the callback function should not be hardcoded either. We can tell the server which callback function to call by passing the name of the callback function in the URL. Here we adjust the JavaScript injecting code a bit.

<script type="text/javascript">

function onDataReceived(responseText) {
  var feeds = parseJsonStr(responseText);

  // Do something about feeds ...

}

var elHead = document.getElementsByTagName("head")[0];         
var script = document.createElement('script');
script.type = 'text/javascript';

// callback=onDataReceived
script.src = 'http://www.externaldomain.com/services/feed?tag=gaming?callback=onDataReceived';

elHead.appendChild(script);

</script>

The server-side code takes the "callback=onDataReceived" parameter and passes the JSON string to the onDataReceived callback function:

<script type="text/javascript">
onDataReceived('{"feeds" : [ { "title" : "game1", "date" : "03-21-2011", "author" : "David Smith" }, { "title" : "game2", "date" : "03-22-2011", "author" : "Steve Yavorski" }, { "title" : "game3", "date" : "04-05-2011", "author" : "Kelly Lee" } ]}');
</script>

Implementation summary


What client side needs to do?
  • Inject a "<script>" element to the HTML head
  • Encode input arguments as query parameters into the URL of the script element's src attribute
  • Include the name of the callback function to the URL
  • Point the src attribute to an external service
  • Define the callback function that takes JSON string as input argument
  • Parse the JSON String in the callback function

What server side needs to do?
  • Implement service code to answer the client requests, and expose the service through HTTP(s)
  • Get all input arguments from the query parameters
  • Get the callback function name
  • Convert response data into JSON string
  • Pass the JSON string to the callback function

Security concern


The technique of the JavaScript injection is also employed in some Cross-site Scripting (XSS) attacks. Since the consumer of the external service has no control of the returned script, the consumer can be vulnerable to XSS attacks that are introduced by the returned script from the external service. It is recommended only applying this technique for trusted external services.

Monday, January 31, 2011

Adobe reader: Remember last read page

I've been using Amazon Kindle lately. It's such an adorable tool for e-book reading. The most useful feature that I can't live without is synchronizing the last read page across all Kindle clients. I have Kindle clients installed on my Kindle 3G Wireless, Windows, Macbook Pro, and of course my beloved Android phone. And whenever I open whichever Kindle client, it will sync to the page I was reading. Convenient and time saving!

However, not every e-book is in kindle format. Actually most of digital documents are PDFs.

Lately, I am reading an e-book that has 1200 pages! A e-door-stopper. It is in PDF format.

I have to turn off my PC every night, otherwise it will intermittently make high-pitch beeps like a hot smoke detector. My Adobe Reader 9 doesn't have a bookmarking feature. So whenever I open the 1200-page PDF, I have to recall where I was, and click through the "Table of Contents" jungle to resume what I left. (Some PDFs even don't have a Table of Contents! Why author, why?!)

Although this little search 'task' doesn't sound difficult, it annoys me every time. It annoys me so much that today I jumped out my chair and finally decided to end my suffering. I Googled. The keyword is "Adobe reader bookmark". It turns out I've been such a fool for so many years.

The solution is so easy, and yet I haven't found or bothered to find it until today. You don't need to install any addon for Adobe Reader, which I thought would be the case. Just go to "Edit" menu, and choose "Preferences". In the dialog box, select the "Documents" category. Now check the "Restore last view settings when reopening documents" option. Done.


Like what the option is described, it makes Adobe Reader jump to the location where you left last time. Of course, unlike Kindle clients, it won't sync PDF copies on different PCs. But this little feature is good enough for me. I don't have to remember the last page nor I have to click through the Table of Contents. The continuous reading experience feels so good :)